It's All in the Details

I can’t tell you how often a person will come in with a little something to frame and say, “I just want a simple black frame.  I don’t want the framing to overwhelm the art”.  Sometimes, a simple black frame is just right for the artwork,  but we like to give our customers options to show them that more elaborate framing won’t necessarily overwhelm their artwork but can bring out the beauty of the art in very subtle ways. 

In the custom framing world, our goal is never to overwhelm or outshine the art.  Instead, we want to work to create a space where the art can shine.  

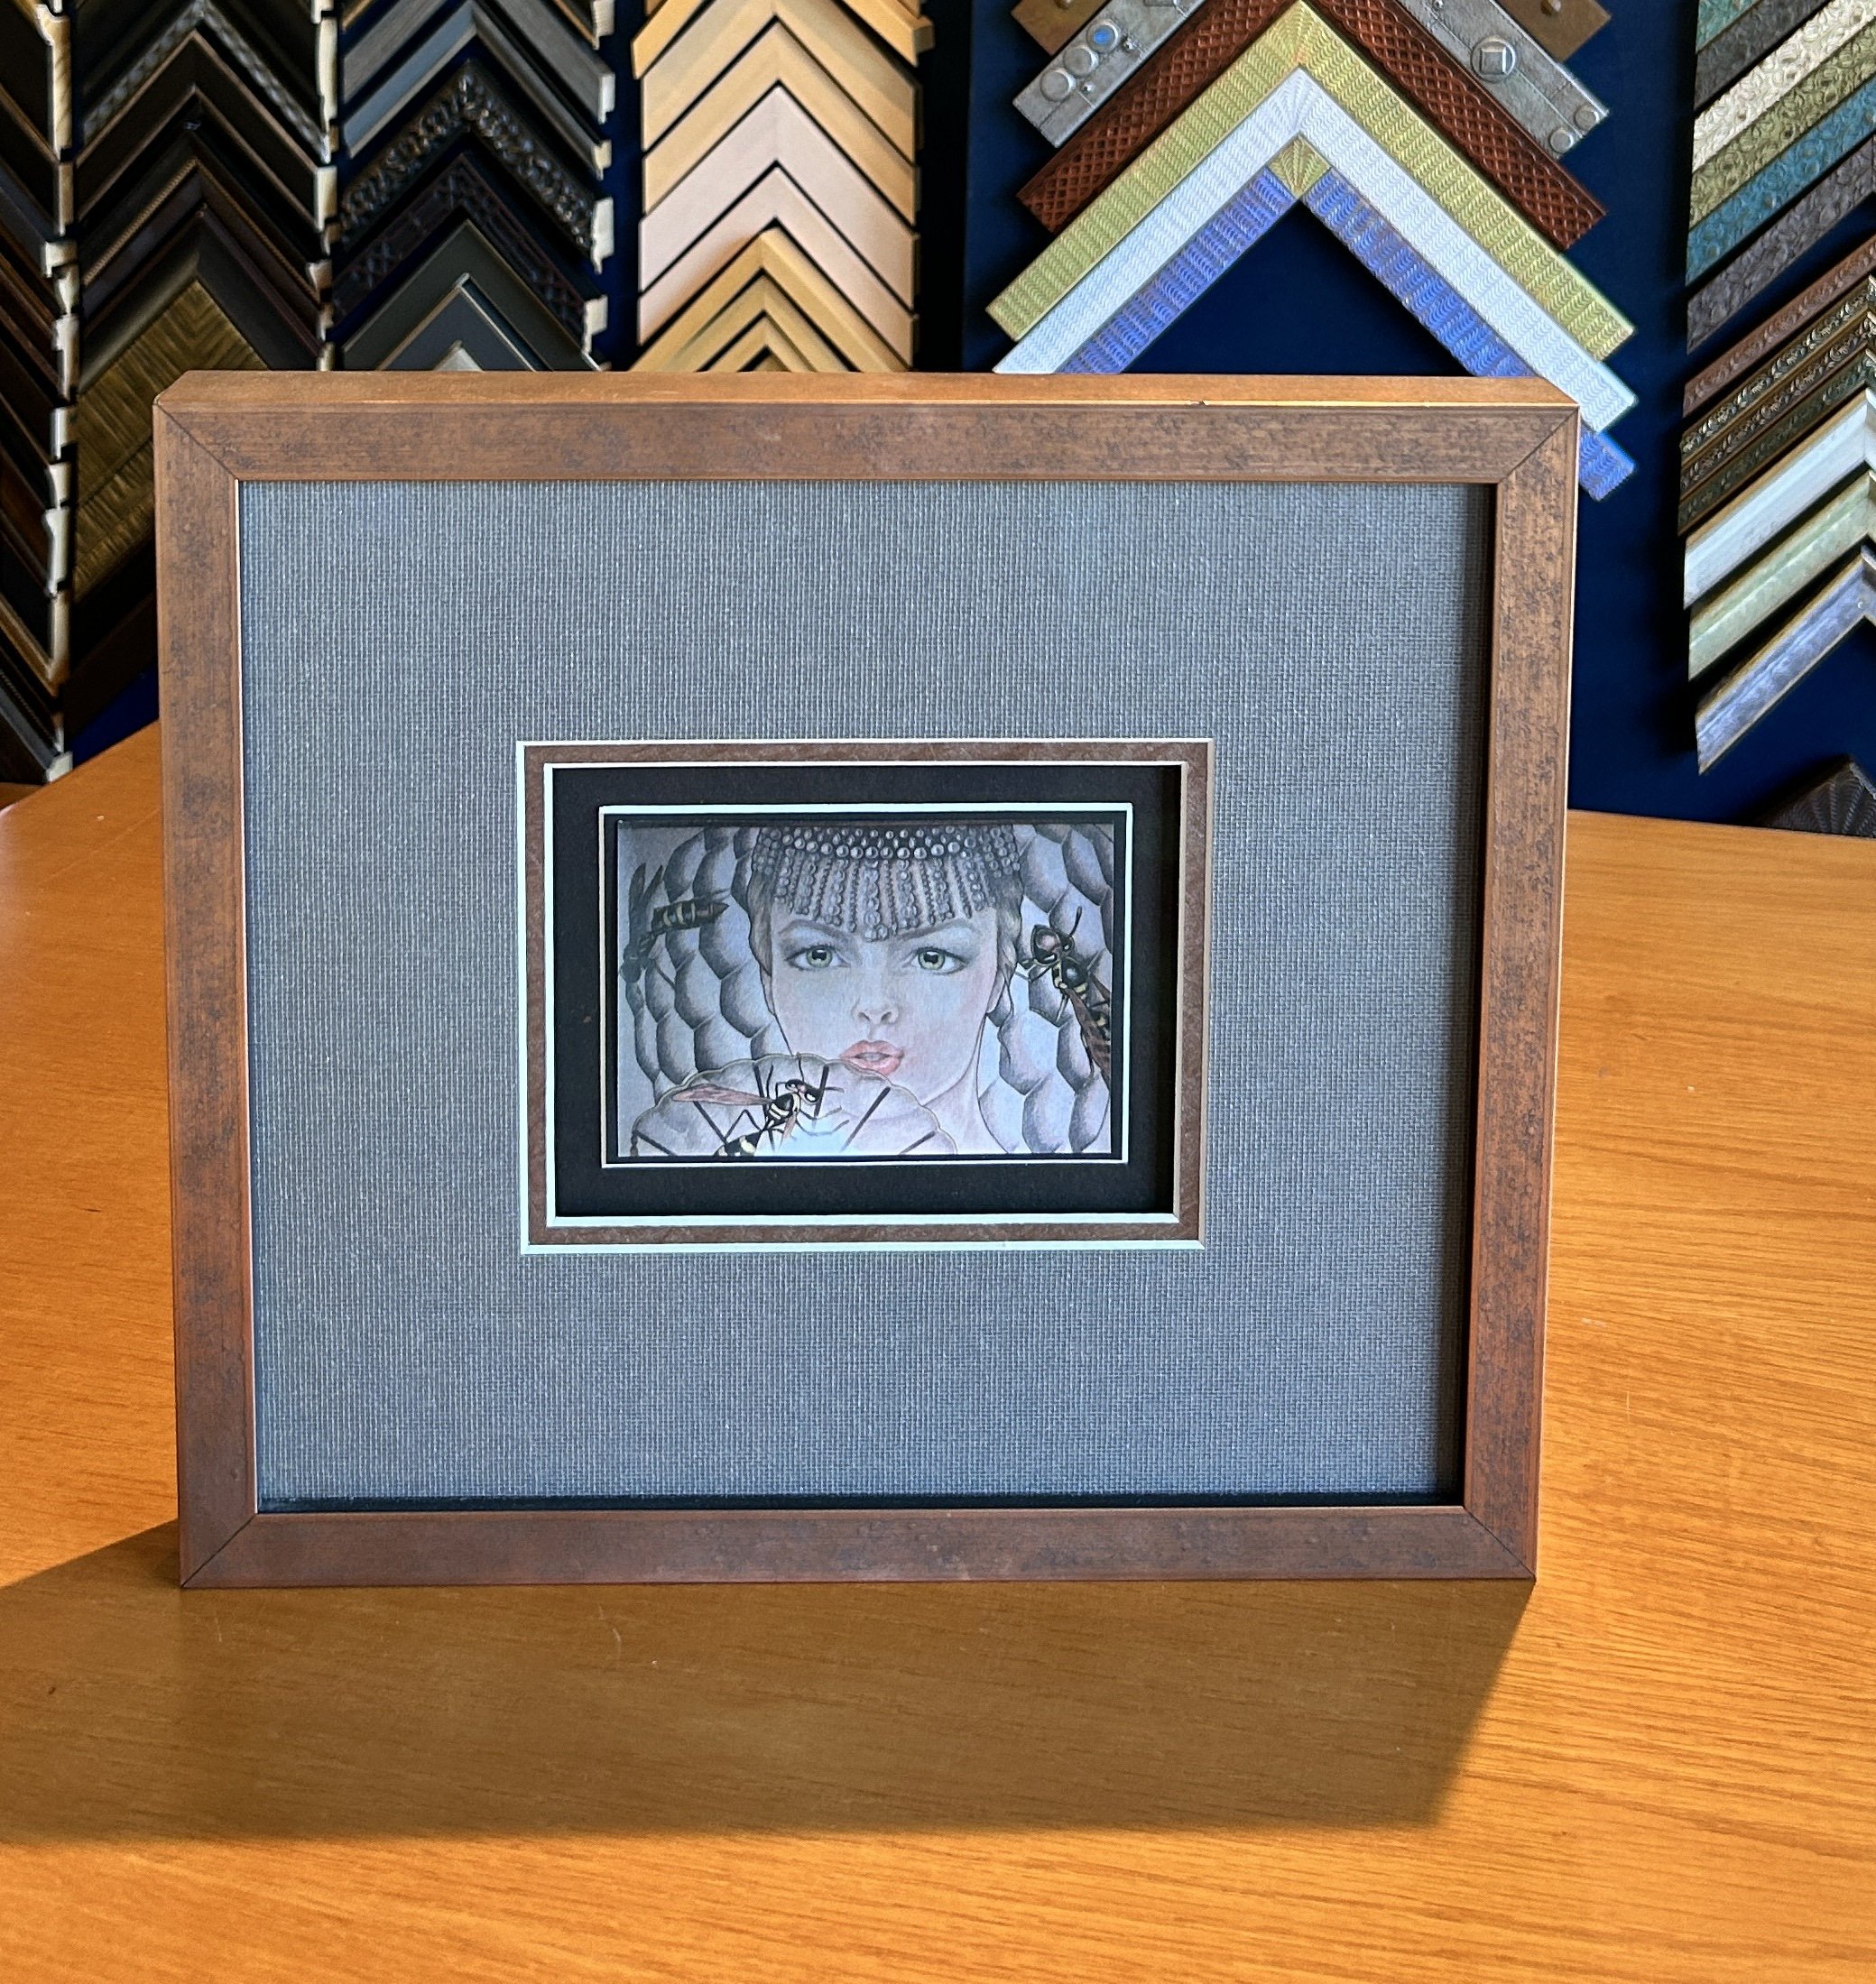
Maybe it’s just a card or a little drawing with no monetary value, but the sentimental value is huge.  This is a photocopy of a very small section of a large painting by Antonia Tyz Peeples.  I had always admired the painting that Antonia painted and sold years ago.  Antonia remembered how enamored I was with the painting and when she came across this little 4.75” x 3.25” simple paper copy of the section in 2011, she sent it to me with her best wishes for a peaceful year.

A classic black frame with a white mat would have looked great on this piece, but we like to give our customers options they may have never considered;  that’s what is so cool about custom picture framing.

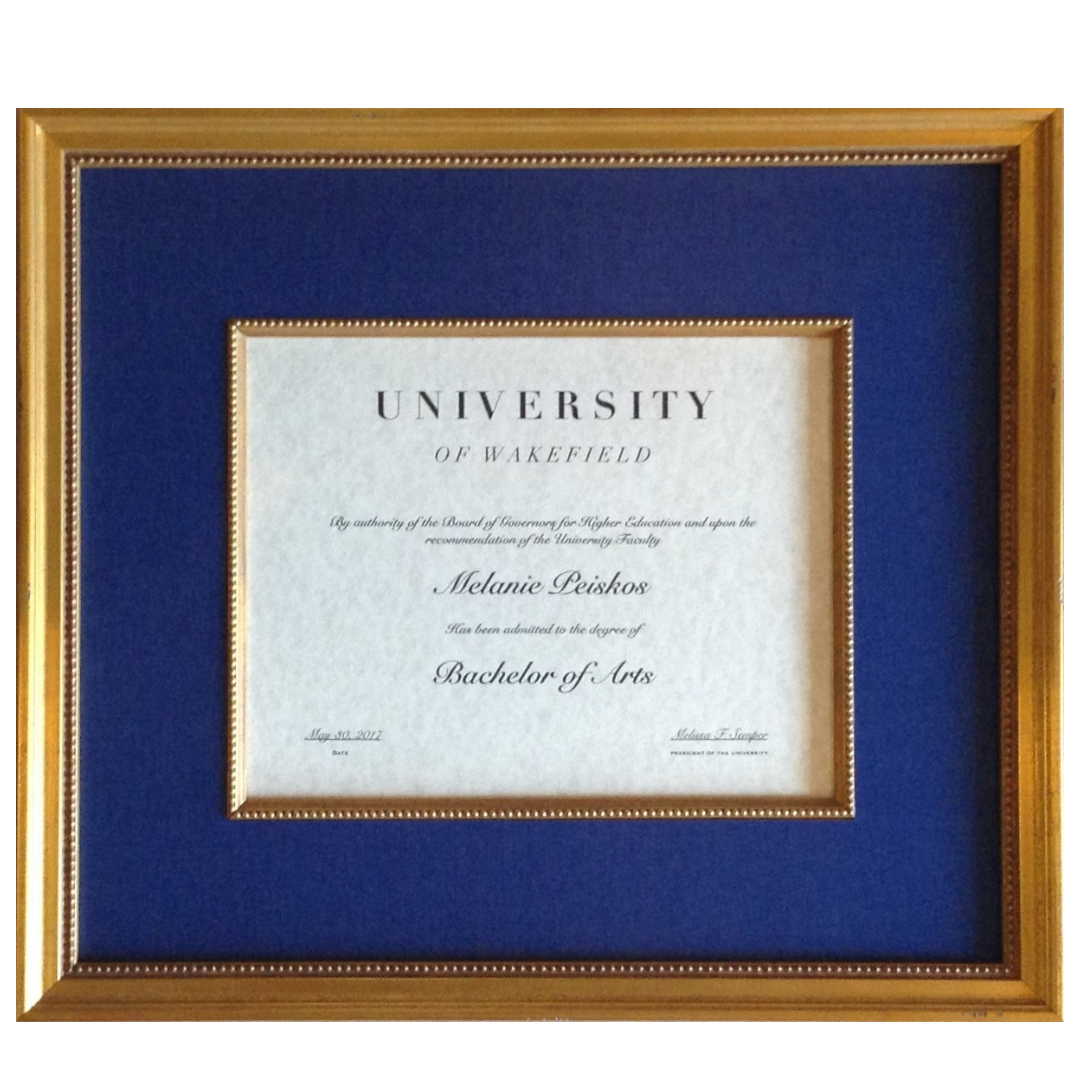
Black and white option

Textured mats, subtle sparkle, and color also work great.   And in the end, if the more traditional option is chosen, our customers know they have chosen the best option for them and their vision of the art.

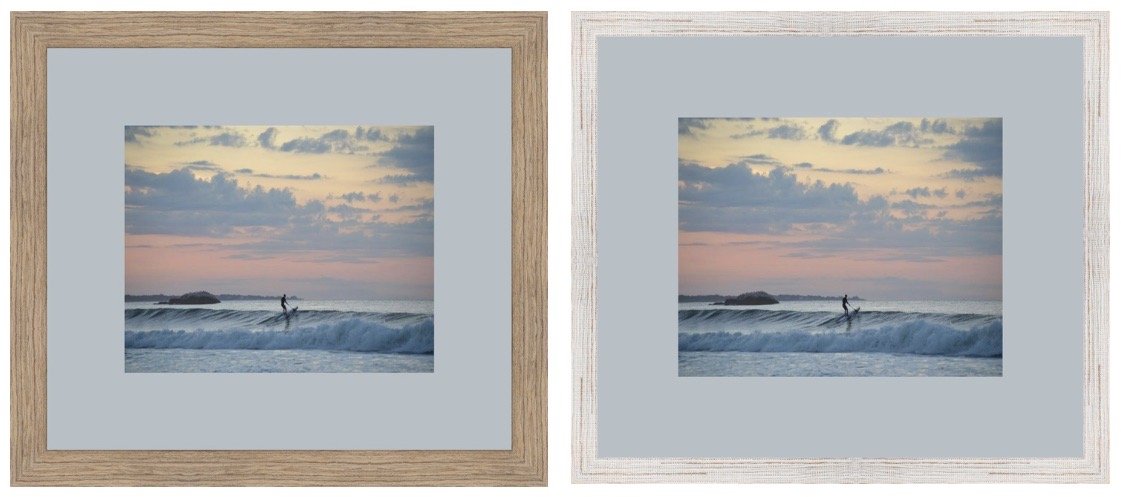
Color and textures in matting and framing.

What is the first thing you notice when you look at this artwork?  It’s the girl. Your eye is immediately drawn to what is most important:  the subject.  Then, you begin to notice the matting and framing and appreciate the details and how the various components work together to complement the art and draw your eye in.

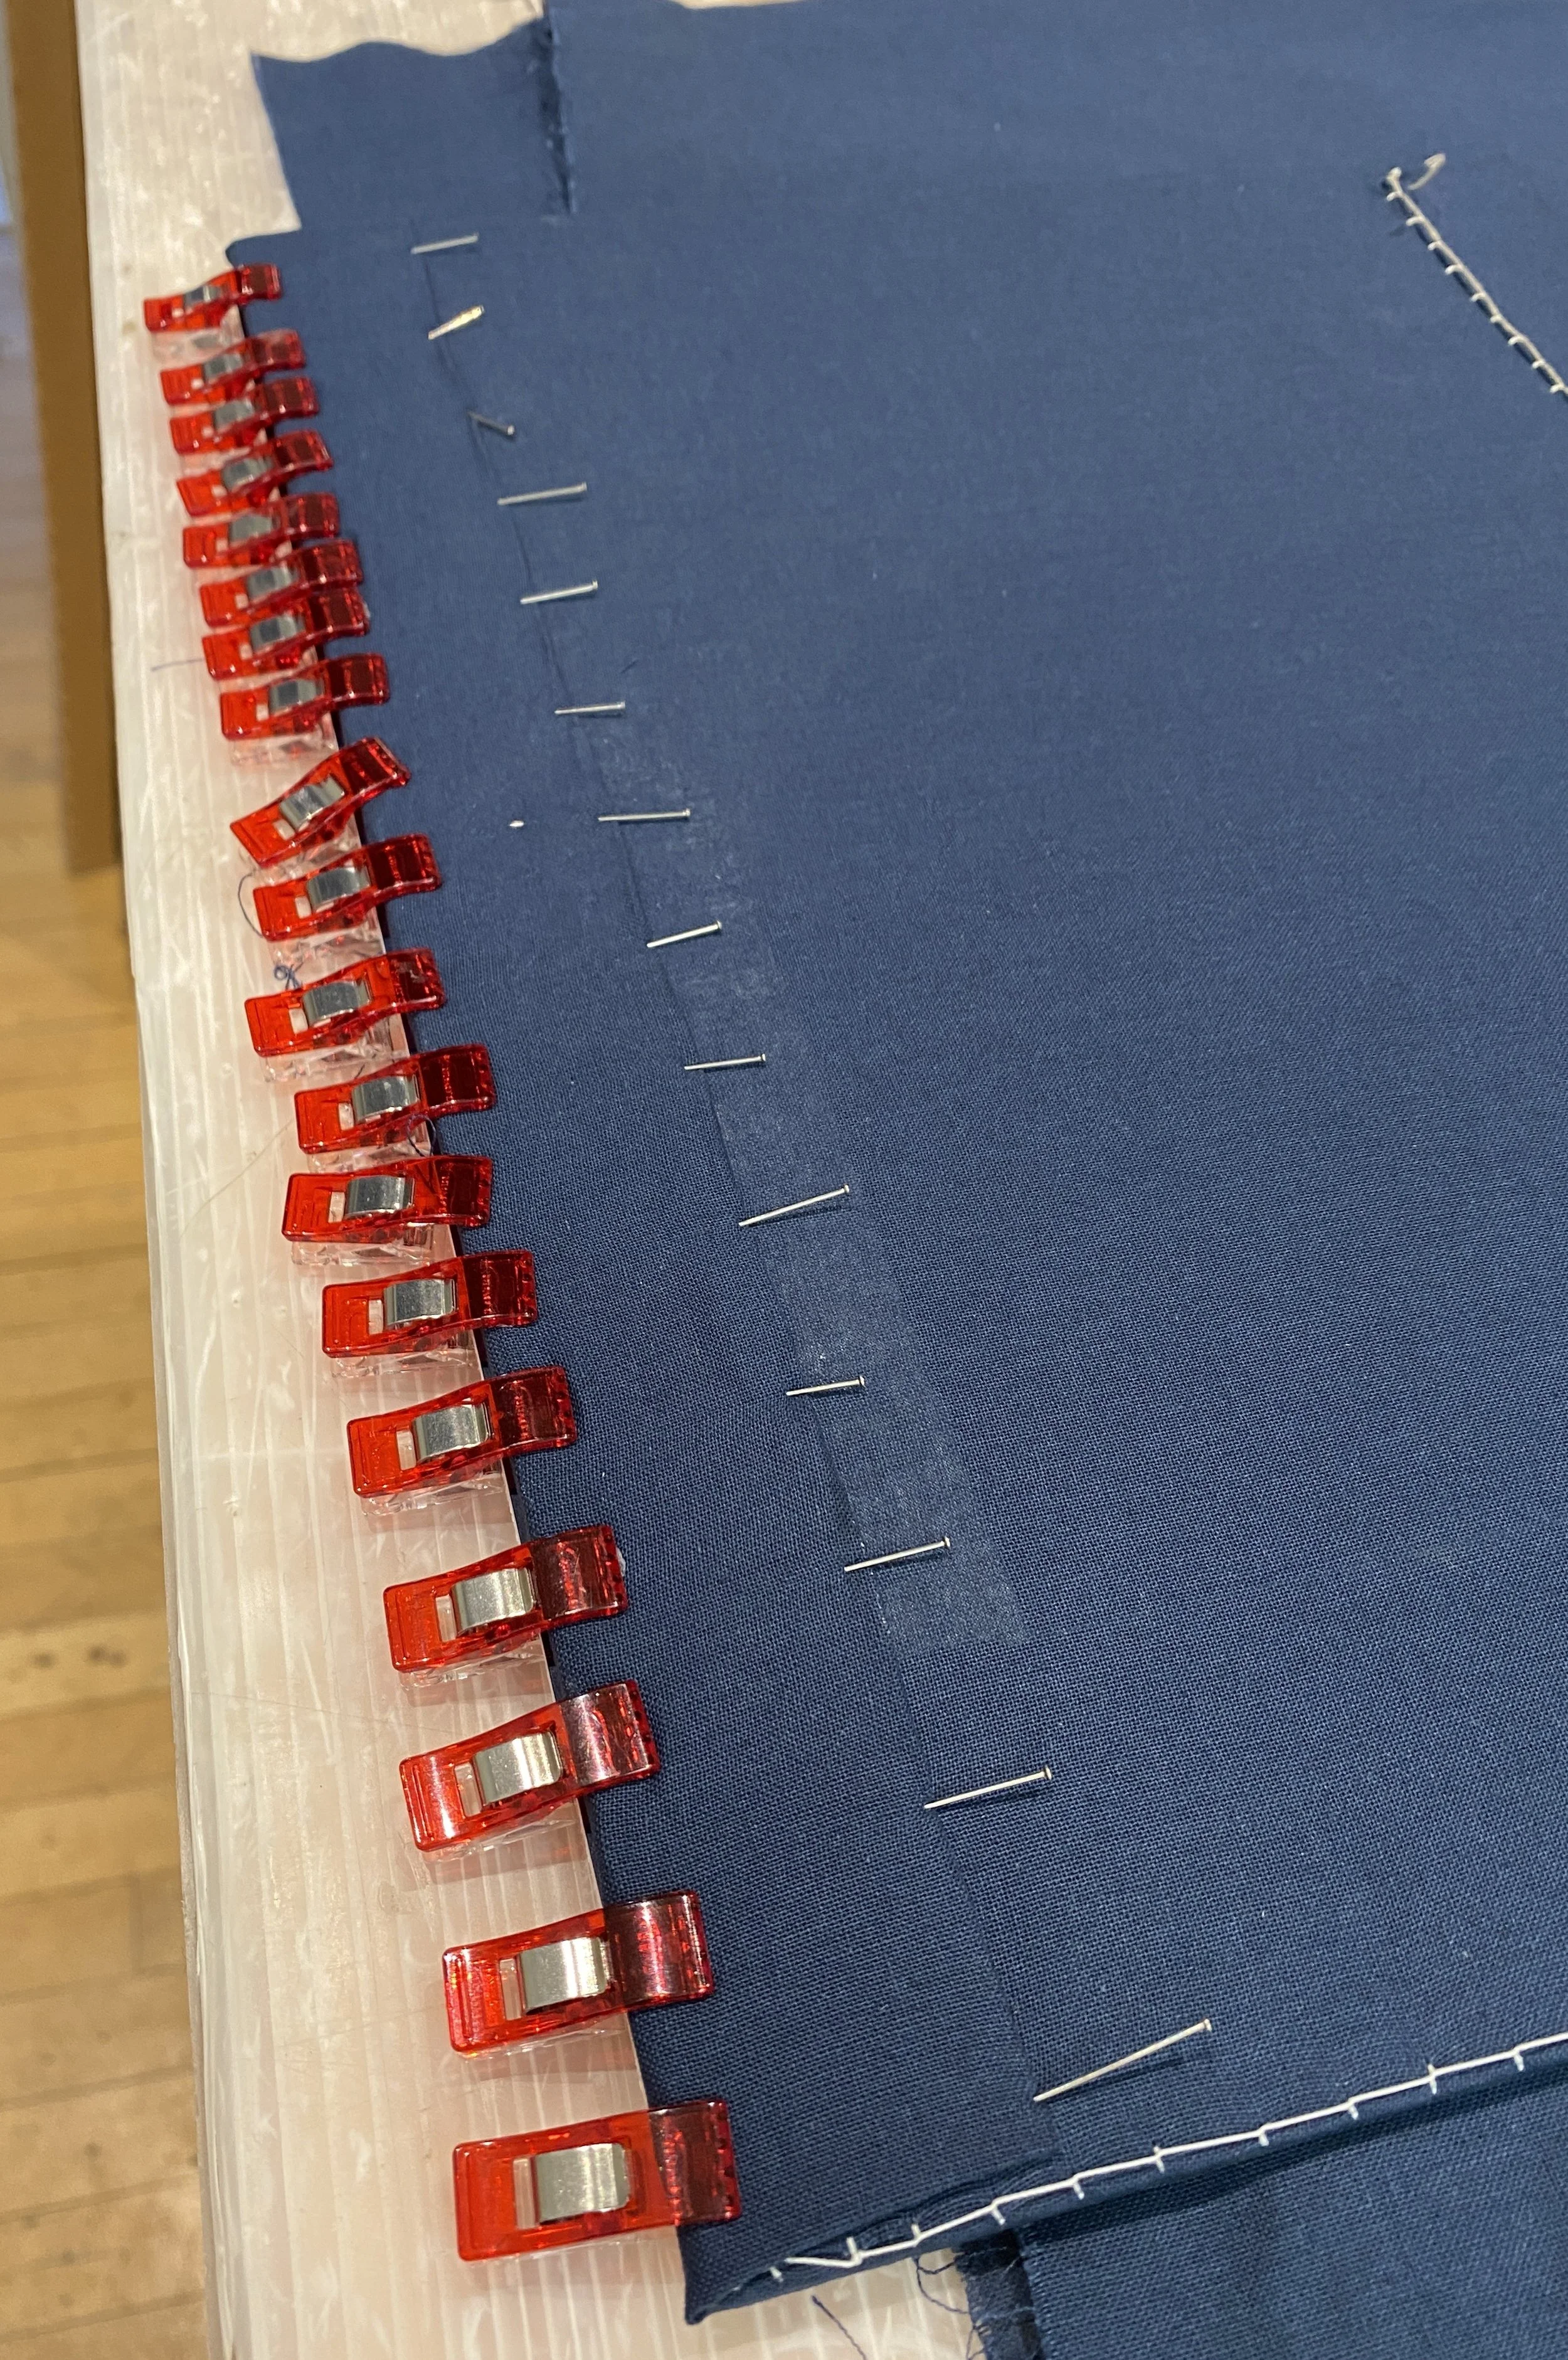
Let's consider the process of custom framing a small piece like this. The paper was cut unevenly, so Evan mounted the image onto a black mat to visually minimize the uneven edges.  A white beveled edge created a nice crisp look when this component was top-mounted onto another black mat and surrounded by two more mats.  The gray mat is a fabric mat with sparkle, and the copper-colored accent mat has texture and some shine. Evan used a spacer to elevate the top two mats about 1/4” above the art, creating a sense of depth and drama.

Notice how the copper frame and the mats harmonize with the art, drawing your eye directly to the most important element: the art itself.

Showing the sparkle of the mats and the shadow created elevating the two outer mats up over the art.

This is relatively elaborate framing with 3” of matting and multiple mats, yet rather than overwhelm the art, it works together with the art for a lovely presentation.

Many times, it’s the details that make all the difference, and when you work with a custom framer, you have the advantage of our skills, access to materials,  and years of experience.

Finished faming

Framing a Vintage Beaded Bag

At Finishing Touches Picture Framing, we recently had the pleasure of framing a remarkable 100-year-old beaded bag that was rich in history and beauty. Handling such a delicate and precious object required special handling and a deep appreciation for its significance.

Lovely hand-beaded bag

Our first step is always talking with our customer to learn about their item and understand how they would like to see it framed.  Together, we decided on a lovely blue for the background color and a patterned silver frame reminiscent of the era of the bag. 

Beginning to plan the design.

The mat is for color ideas only.  We purchased a 100% cotton fabric in a similar color and prepared it by hand washing to remove any excess dye and chemical residue. 

This bag originally belonged to our customer’s grandmother, and although it was lovingly cared for, it’s fragile due to its age. If you were to examine it closely, you’d see that each glass bead is strung with thin cotton thread.  The beads are glass, so the bag is heavy, and the sheer weight of the bag puts a strain on the cotton thread.  We could not risk stitching the bag down as we often do with textiles because we were afraid that any pressure on the threads could cause them to break.

Magnets were the logical choice for the job. A rag mat with an opening the size and shape of the bag was cut to allow maximum hold for the magnets, and then the mat was covered tightly with the prepared fabric.

White thread was used for clarity in the photo.

The magnets were placed on the inside of the bag securing the bag in place.

A support for the top was constructed from the blue backing fabric. It was a couple of inches longer and just a bit narrower than the channel holding the bag closure.  The support fabric was threaded through the back channel and the support under the beads was hand stitched to the base fabric. You can see in the second photo that I had to gently lift the beaded sections up and hold them out of the way to stitch the support fabric to the base fabric.

Bag with magnets and support strip inserted into back channel.

Hand stitching the support fabric to the backing fabric.

A layer of polyester batting was cut to the correct size and shape and carefully placed within the bag to cushion the bag and also prevent the front of the bag from sagging.

Support fabric secured to the backing and polyester batting inserted.

Next a second support fabric was threaded through the front channel and the two support layers were stitched together ensuring that the top of the bag is supported while nothing is stitched through the beads.

The two support layers stitched together.

The excess support fabric was threaded through a slot cut into the backing and stitched securely to the back.

The photo below is the view from the back. It shows the stitches tightly securing the fabric around the rag mat, the magnets in place, and the ends of the support fabric stitched securely in place.

View of the back.

Once the bag is carefully mounted, the frame is built with shadowbox details covering the inside edges. This not only dresses up the interior of the frame but also ensures that the Museum Glass will sit high enough above the bag so there is space between the bag and the glass.

What a beautiful family heirloom! The bag is protected and will be enjoyed and appreciated by generations to come as the true work of art that it is.

The finished beaded bag.

Summer Weddings

The month of June is a wonderful time for a wedding. Spring is turning to summer, yet the temperatures are still on the mild side, lawns are green and lush, and the flowers are in bloom. Did you know that the tradition of a June wedding can be traced back to Roman times? June gets its name from “Juno,” the Roman goddess of love and marriage.

Photo by Jonathan Borba on Unsplash

Here in Southern Rhode Island, we have the advantage of miles of lovely beaches and other naturally beautiful landscapes that are great venues for a summer wedding.

Planning a wedding is no small feat, and we are here to help in any way that we can.

Wedding mats are always popular and a great alternative to the traditional guest book. We can cut a mat in the proper size to accommodate the number of guests that you are expecting. What’s more, although we are happy to provide you with a white mat, why not use a color that reflects your wedding colors? Just remember that the mat should be relatively light in color so the good wishes really stand out. The accent mat can be a deeper, more dramatic color or softer, depending on your personal taste. Be sure to use an archival pen, like Micron, to prevent the signatures from fading.

Photo of couple by Carsten Vollrath on Pexels

Not sure about what size mat to use? If your wedding is small and intimate, a 5 x 7 photo with 4” of matting all around is a good size for about 60 signatures and wishes. For larger weddings, use an 8 x 10 photo and the following rule of thumb for the number of signatures and wishes:

  • 5” of matting will accommodate approximately 120-140 signatures.

  • 6” of matting will accommodate approximately 140-160 signatures.

  • 7” of matting will accommodate approximately 160-200 signatures

After the wedding, we will help you choose the perfect frame to compliment your wedding picture. And remember, we can professionally print your photo in-house. The print is always free if you frame it with us.

Great Gift Ideas

Tabletop frames are great gifts for members of the wedding party. We have a nice selection of Prisma frames in sea glass colors that are especially meaningful for seaside weddings. They are available in 5 x 7 and 8 x 10 sizes and various colors. Please know that in order to have quantities in matching colors, we need a couple of weeks’ notice.

Just a few of our table top frames.

Gifts for Parents

Framed wedding photos are wonderful gifts for the parents of the bride and groom. We are always pleased to work with you to find just the right framing that will fit your parents’ homes and suit the photo as well.

Photo by Burak Evlivan on Pexels

We really like this framing because it gives a nod to tradition with the soft gold frame and off white mat that blends so well with the photo. And we love that the details of the frame repeat the details in the bride’s dress.

Photo by Asiama Junior on Pexels

What if Mom and Dad’s home has a casual, coastal vibe, but they are not into driftwood or distressed framing? Something like this is perfect because the antique silver coloring with the grillwork pattern strike just the right balance between the formal attire of the bride and groom and the decor in Mom and Dad’s home.

Photo by Muhammadh Saamy on Unsplash

If it’s coastal casual you’re after, we’ve got you covered. We have a wonderful selection of coastal frame samples from driftwood to cottage white and everything in between. We chose an accent mat of aqua between the crisp white mat and the photo and topped it with a simple grained wood that works as well in a contemporary or eclectic setting as it does in a seaside home.

How Can We Help?

Have a question or a special request? Give us a call; we’re happy to help in any way that we can.

Congratulations, Graduates!!!

Photo by Pixabay on Pexels

You worked HARD for that Degree! And invested a significant amount of time and money into your education. The framed Degree hanging on your wall represents all the hours that you spent working toward your goal, and now you can look at it and feel a real sense of pride and accomplishment.

What options are available to me?

The possibilities are endless when custom framing a Degree. We believe that just like any other framed item, your framed Degree should reflect your personality.

We have several framed samples in the store to get the conversation started and give you some ideas. A simple single mat with a dark wood frame is always going to work, but what if that’s just not you?

Gold frame with mat and filet

This is an example of a traditional gold frame with a bit of a twist; the blue fabric mat and matching gold filet add a nice touch to this Degree. We love how a fabric mat reflects the light giving the mat a richness of color. The combination would look great in any office or workspace. Museum Glass is always a good choice because, as you can see, there is very little reflectivity and the frame can be hung in any location without reflection.

Framed diploma with triple matting

Here’s another example. We used a triple mat on this one. The top mat has a subtle texture, and the two top mats are cut traditionally. The inside mat has a special cut in each corner; it’s just a little touch, but it makes it special. The frame has a “hammered” finish and would look great in any office, from one with traditional decor to a converted industrial space.

Musical Notes!

We have a number of mouldings that are perfect for certain pieces, and really, what could be better for this Degree than musical notes? We chose a black top mat and a gold accent mat that’s similar in color to the college seal. Love it!

Something Special for Your High School Graduate

Remember that Special Day!

High school days are marked with photos! Senior photos, class photos, and fun photos with friends can be framed along with the diploma, cap, and tassel, as well as programs from those great plays, ticket stubs, athletics recognitions, and other treasures to create a terrific collage of those special days.

How Can We Help?

Come in with your ideas, and we’ll be happy to help you choose just the right framing for your project. Design consultations are always free.

Calling All Artists!

May is the month when artists and photographers gear up in earnest for the upcoming season of art shows.  Whether you are a professional artist or just beginning to show your work, there are some things that are important to consider when preparing your art to show.

Photo by Jennie Razumnaya on Unsplash

Signing artwork

Every work of art should be signed.  And adding a date is not a bad idea either.  Even if you are not a professional artist, it’s important for future generations to know that you created that lovely work of art. 

What should you use to sign artwork?  If it’s not a painting where you can use a coordinating paint color, a good choice from an archival standpoint is a Micron pen.  You can get Microns at any good art supply store, and we have some in the store if you want to sign your art just prior to framing.  Sharpies will fade.  Pen or pencil will fade as well. 

Be sure to sign the artwork at least 1/2” up from the bottom and in from the sides.  Roughly 1/4” of the art will be covered by the frame if not matted.  And if you do mat, we still need to cover some of the art to keep it in the mat.

Photo by Loretta Smith

What frames work best?

Artists often ask me what frames sell best.  And if they should frame at all or sell their artwork matted. That really depends on your artwork and your audience.  Remember that the frame and matting should work together to draw the viewer’s eye into the artwork, so a simple black frame may not be the best choice.  We have lots of choices that can be used in a multitude of settings and will blend with a number of styles of artwork.  

Why not do some testing and note your customers’ reactions when showing your work?  Try different styles of frames and also try just matting some pieces to see which your customers prefer. 

We once worked with an artist who tried several different styles of frame and finally decided to sell all of his paintings in the same gold frame.  He liked how his work looked in that frame and reasoned that if a customer didn’t like the frame, he would sell the art unframed and include one of our cards with the artwork.  The customer would then be able to have the artwork framed in something that really appealed to them, and the artist would use the frame on another painting.  

Cardboard corners protect the corners of the frame during transport.

Transporting artwork

When we finish a frame, we wrap the framed art in plastic and put cardboard protectors on each corner to cushion the corners while in transport.  The last thing you want is to damage the frame transporting it home.  Artists should always protect the corners of the frame while transporting to and from shows.  

Be sure that you have cleared adequate space in your vehicle for your framed art;  resting it on top of all of your other stuff is never a good idea.  And never leave framed artwork in the car while you do other errands.  Especially in the summer.  The heat in your closed car can be damaging to your artwork.

Artwork storage

Storing artwork between shows

If your artwork is matted, it’s very important to be sure to store it so the top is up.  The hinges holding your art in place are meant to be at the top of your artwork at all times.  It may make more sense in your space to line frames up by size and shape, but that artwork that is stored with the top of the painting to the side puts stress on the hinges, and they will fail over time.  

We wish you the best of luck in the coming season, and remember that we are always available to help in any way we can.

Warmly,

Jan

Are you hosting for Easter or Passover? Refresh Your Walls in a Hurry.

Six simple ways to refresh your walls

Photo by Jonny Caspari on Unsplash

Stand back and take a good look at the artwork on your gallery wall. Are any of the pictures askew? If you straighten them and they don’t stay put, take a look at the back of the frame. You should have bumpers on the bottom corners of your frames. Bumpers are small, self-adhesive pads that are either felt or clear silicone that cushion the frame on the wall, and that goes a long way towards keeping the frame from shifting position. We have them here in the store and are happy to supply you with a few free of charge.

is further attention required?

Take a closer look. Maybe your framing needs a little cleaning. Usually, all your artwork needs is a simple dusting. We recommend using a feather duster or similar and just lightly dusting the frame and the glass.

Does the glass still need more attention? Are their fingerprints or marks that won’t come off with a simple dusting?

The next step is to use a microfiber cloth and lightly buff the glass. If more attention is needed we recommend cleaning the glass with a glass cleaner that does NOT contain ammonia.  And this is most important …. use a small amount of cleaner and ALWAYS spray the cloth.  NEVER spray the glass;  the cleaner could run down the glass and collect at the bottom and seep up under the glass, ruining the mat and/or artwork under the glass.

how can we help?

  • Often simply changing a mat will give new life to your artwork. Especially if your mat colors no longer blend with your decor, or if you find that the mat is stained or damaged.

  • Maybe you still love your frames but no longer like the artwork. Why not consider simply changing out the art. Replacing that somber landscape with a spring floral will give your wall ( and you!) a nice lift. We can change out the photo for you for less than $35 for a 16 x 20 size frame and have it ready for you for your holiday celebration.

New Painting Class at Finishing Touches

We are excited to welcome artist Julie Brayton back to Finishing Touches.  Many of you are familiar with Julie through the Paint Night events that we’ve hosted and, of course, her paintings that we sell in our store.  This time Julie will help students really delve into painting in a relaxed and intentional way.

Learn to understand seeing and painting color and light while also learning how to paint a wave using the medium of Oils. Many find painting a wave to be a challenge, but with this step-by-step approach, you will finish the program wondering, who painted that painting?! 

This class is good for all levels, those of you just beginning or wanting a refresher course, as well as the more experienced artist wanting to try a new technique.

The class will meet on six Thursday evenings from 6-9, March 23 - April 27.

The cost for the six-week class is $210.  

A list of required supplies will be sent to participants upon registration.

Create Your Best Year Yet

Image from the 2022 retreat in the south of France.

Have you ever wondered why New Year’s Resolutions don’t work? How can you make this year your best year yet?

Join us at Finishing Touches Picture Framing on January 12th from 7:00pm to 8:30pm when Benjamin Blackett, Certified Life Mastery Consultant, will share the most successful people's secrets for creating extraordinary lives.  You’ll learn how to relate those secrets to your own life and gain an understanding of the key ways of achieving the life you’d love to live.

How does the option of kickstarting your dreams during a retreat in the south of France sound?  Benjamin will have all the details of his next retreat happening in June.

The cost is $15, and you can reserve your spot here.

Smartphone Photography Class

Ever wish you could take better photos with your phone's camera?  Come to Finishing Touches, where Amy Short from Amy Kristin Photography will give tips on making the most of the camera that's always with you, and you’ll learn how to take photos that are sure to impress.

We'll review lighting, composition, focus, editing options, and more in this fun class.  Whether you want to take portraits, landscapes, or lots of pet photos, you'll come away with tips that will improve your photos.  All you need to bring with you is a smartphone.

The class begins at 6:30 pm on July 14, 2022, and ends at 8:00 pm.

This event is free, but space is limited. Register here

We Are Hiring!

Finishing Touches is a busy frame shop located on Main Street in Wakefield, RI in the heart of a district that is a great mix of restaurants, small boutiques, yoga studios, a gallery, community theater, antique stores, as well as professional offices and traditional businesses.

We are looking to hire an individual for in-store marketing, retail sales, and inventory control.

The position is part-time with 12-14 hours per week. We can be flexible, but hours will include occasional evenings and Saturdays during the summer and fall.  

Compensation is $12 - $15 hourly.

Responsibilities include (but are not limited to):

Instore marketing:

  • Update Window Displays monthly.

  • Prepare monthly promotional items.

  • Maintain outdoor sidewalk sign with creative and engaging designs.

  • Rotate artwork and gift items within the store for a fresh look.

Inventory Control:

  • Maintain a monthly spreadsheet of discontinued moulding and mat samples.

  • Locate discontinued moulding samples and remove them from the wall.

  • Locate discontinued mats and remove them from the mat caddy.

Retail:

  • Become familiar with frame design and the framing process.

  • Retail sales of gift items.

Qualifications:

  • Possess a positive attitude.

  • Enjoy meeting and working with people.

  • Have good communication skills.

  • Strong interest in the creative arts and/or textiles.

  • Self-motivated.

  • Basic computer skills.

  • Have good organizational skills and attention to detail.

  • Knowledge of photography is desirable but not a must.

Are you interested? Do you know someone who might be interested?  Contact Jan